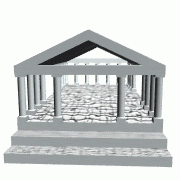
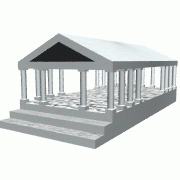
You are soaring above the clouds when you spot a majestic temple. Constructed of solid rock and standing 40 feet high you realize that this is no ordinary building as it hovers above the clouds.
As you enter the temple you are struck by the ominous nature of the inclosure. All around you there are tributes to war.
You realize that you are in the temple of Ares, The god of war. A shiver runs down your back as you survey the room, filled with images of war, ruin, and suffering and marble statues of mythological characters. You pause as you examine the images that float in midair.
As the fear within you grows as you decide quickly to leave. You discover that an invisible barrier engulfs the structure. There is no way out.
Panic sets in. You fear what might happen should you not escape. Madness?
At the other end of the temple you spot something that you had not noticed before. The peace sign spins above a lava-like pool. You approach the pool and notice that it gives off no heat.
In a moment of clarity, or insanity, you fly into the pool.
You now find yourself in a tunnel. You are happy and excited. What secrets await you at the end of your journey? Enlightenment? The key to peace in the world? Perhaps even the secret of life?
Nah! None of that, the animation only had to be 15 seconds.
The modeling that was involved in this project proved to be the most time consuming of the tasks that were necessary. Although our efforts paid off with great visual effects.


The temple is of course the main object that one sees but it is not meant to be the focal point of the project the animation was the main crux of the project.
The temple is based on one of the tutorials in the Alias documentation but modified in size and structure. The temple is build with different primitives such as cubes, spheres, and cylinders copied and scaled. It was necessary to make the temple of a very large scale because of the size of the objects that were being imported.
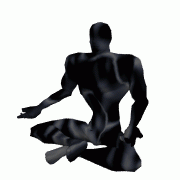
The statues are not the main focal point of the animation but are in it to help set the ancient temple mood. The statues are of mythical characters who were known in the ancient Greek world for their fighting skills. Hercules, Achilles, Hektor and Nestor all have a place in the Temple of War.
The statues that appear in the Temple of Ares, the god of war, are created using Poser 2.0. This powerful tool allows the user to manipulate the limbs and body of a wireframe human being. Some of the statues were preset models in Poser that captured the mood that we wanted in the animation. The rest of the statues were modeled by simply moving the arms and legs into the correct positions.
The statues were exported from Poser in .dxf file format and imported into Alias. The next step was to apply a marble like texture to the statues and place them inside the temple. It would have been unusual to find a temple in ancient Greece that did not contain the likeness of the heroes and gods of the time so it seems natural that we give the heroes a place in our temple.
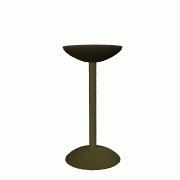
The fire alters are the yellow torch stands that holds the fires that light the temple. The alters were created in Alias by drawing one side of the alter and rotating around the y axis to create the rest of the object. The original curve is then deleted and you are left with the finished product less the texture. The description of the brass material that we created and used is in the textures section.
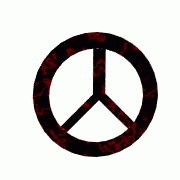
The peace symbol that is floating magically above the lava pit tries to symbolize the opposite of what the temple is created to worship. It was modeled by using a circle and using chords/lines to make the internal design. Once the skeleton was complete a skin surface was added and the texture applied to the surface. The skeleton could then be removed and what remained was the surface. It was left 2D and not extruded to give a more unreal look to it.
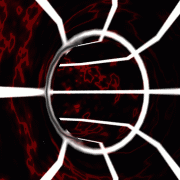
The tunnel was created by placing a circle in the scene and then extruding this circle along a motion path. In this way the circle follows the motion path and creates a cylinder in the shape of the path. Once the tunnel is created you may then delete the circle and use the motion path curve to animate the camera. One of the predefined textures was then used on the inside of the tunnel.
The names of the authors at the end of the animation were created by first choosing a font and typing the names in a choosen format. Next, the names were bevelled and placed at the end of the tunnel. Finally a silver texture was applied to the names.
We found that by creating our own textures we could better capture the image that we wished to communicate. All of the custom textures are described below and were all created using Photoshop 4.0.
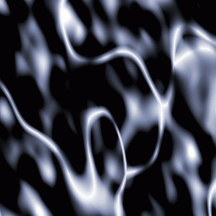
The black marble texture that is used in our animation was produced using Photoshop 4.0 with the Kias Power Tools 3.0 plug in which runs through Photoshop.
The process started in Photoshop where an image of 3 inches by 3 inches was created and filled in black. The next step was to go to the Kias Power Tools menu and select the texture explorer.
The texture explorer allows the user to start with a basic sample and mutate the model producing children with every mutation. The childern often share characteristics with the parent texture. To create the black marble we select childern that had black and white patches and further mutated them. Eventually, the required effect was achieved.
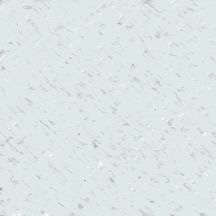
The white stone texture that is used on the columns and the sides of the temple is an attempt at re-creating tavertine, a building material commonly used in Rome during the rule of Augustus. Most of the great monuments of the era were built with a layer of travertine on the outside of a common building stone.
The tavertine was created in Photoshop using an offwhite 3 by 3 inch image. The noise tool was applied to the background to produce a speckle effect and then the chalk and charcoal tool was used to introduce imperfections into the stone.
When the tavertine was imported into the Alias image it proved a little too bright to correct this problem the color balance, rgbmult setting was changed to darken the image.
Unfortunately, some of the subleties of this texture are lost once it is mapped to the temple and other objects. Overall, the desired effect was achieved.
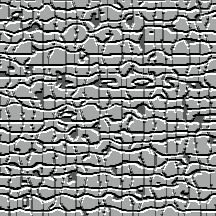
The tavertine material was then copied to a different file name and loaded into Photoshop 4.0 again. In photoshop the Kias Power Tools tiling tool was applied to the image. This is what produces the tiling effect on the floor and steps of the temple.

The brass texture that is used in our animation was produced using Photoshop 4.0 with the Kias Eye Candy plug in which runs through Photoshop.
The process started in Photoshop where an image of 3 inches by 3 inches was created and filled in a gold colour. Next the Chrome option was used to give a brass shine to the yellow and produce a metallic effect. Again the texture did not map perfectly to the fire alters. The overall effect however, is good.
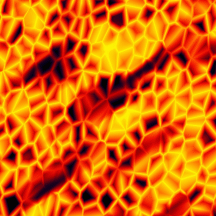
The lava texture that is used in our animation was produced using Photoshop 4.0 with the Kias Power Tools 3.0 plug in which runs through Photoshop.
The process started in Photoshop where an image of 3 inches by 3 inches was created and filled in red. The next step was to go to the Kias Power Tools menu and select the texture explorer.
The texture explorer was used as described in black marble material to find a texture through trial and error. After several attempts a suitable material was found. This texture was animated which is described in the Texture Animation section.
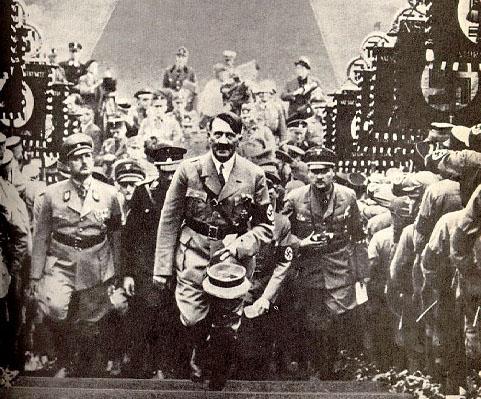
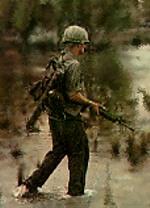
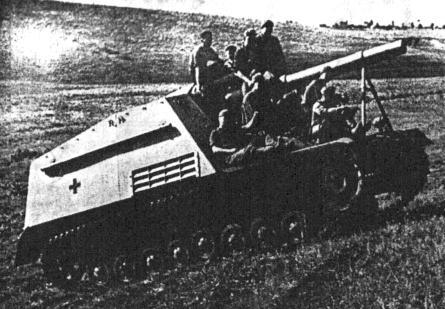
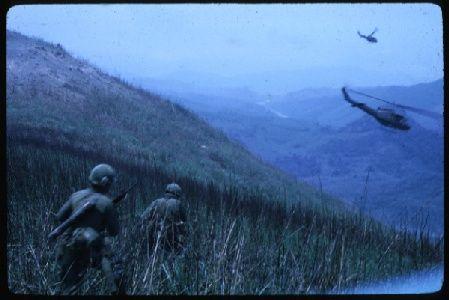
The portraits on the wall are again symbols of war. The difficult part was finding JPEG on the net that fit the mood and the look that was required.
XV was used to convert the images to a TIFF format it then could be imported into ALIAS as a texture and mapped to the flat planes that are in front of the hanging frames.
The Animation was the main crux of this project (because this was supposed to be an animation project) and the one that was spent most of the time due to its importance the goal was to attempt as many types of animation as possible
For the temple scene the camera was animated by first creating a motion path then the camera was placed on this path. The camera was moved at certain position within the scene and then key framed. Therefore the first step was to draw a curve by selecting Curves -> New Curves -> New Curves (cvs), the curve was started from outside of the temple at an angle looking down on the temple, then through the temple to the lava pool. The difficulty encountered in key framing was the timing. It was difficult to gauge when to key frame, the only way to really see how your timing worked was to make a test render and see how well it looked. The motion path was used as a guide for the camera to keep the camera steady and it was easier to manipulate the camera when it was 'attached' to the motion path.
When using motion paths there are few rules one must follow. First you must place the camera and its pivot at the origin because it is the pivot point that follows the motion path, once you have moved the camera and its pivot you must then group them at at the origin, to give it a new node. This places a new pivot point at the origin and lets you treat the camera as a new object. The grouped camera will follow the motion path through the new pivot point, which sits at the origin. Once this is accomplished you need to place the camera on the motion path and properly set the direction of the motion path curve. The camera will follow the direction of the curve created.
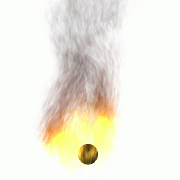
The particle system tool in Alias was used to create the flames of the torches in the temple.
To set up the particle system a sphere was placed at the origin and scaled to the right size. Next, two directional lights were placed pointing downward through the origin at odd angles to the y axis. The next step is to create a particle shader that is applied to the sphere. The particle shader's properties are set to "tube" behaviour and "torch" preset mode.
Before the particle systems can be viewed the particles must be toggled to on in the toggle switches menu. The particle system must then be run from the run properties menu. The flame can then be added to the scene and placed on top of the torches.
Interesting point, the sphere and particle system will fall to the x plane because the particle system has simulated forces acting on it and it is reacting to gravity. The mass of the sphere must be set to zero to prevent the sphere from moving from its set position.
The piece symbol animation was created by key framing the position/rotation of the peace symbol at different time intervals. This object was the first attempt to animate using Alias and gave a good first learning experience with the animation tools in Alias. One of the lessons first encountered was that when key framing rotation of an object (this is true for the textures also) one must remember that if you rotate the object by 180 degrees and you want to return to the original location not to rotate the object to 0 degrees but it should be rotated to 360 degees to have a smooth rotation. The rotation angle must be chosen depending on if the axis of reference is in absolute or relative mode. If this is not followed the animation appears to oscillate between the start positon and the end position and not rotate around as was the case for this animation. However once this problem was easily rectified and the required effect was created for the animation of the peace symbol rotating above the lava pool.
The lava pool texture was animated by selecting the uoffset and voffset and keyframing them at certain intervals. The offsets were keyframed by first going to frame 100 and setting the offsets to 1.0 and keying continuing in this manner with frame 200 and offsets of 2.0 etc gave the illusion that the lava pool was in motion. This feature is quite powerfull do to the fact that one may manipulate any of the characteristics of the texture and have them animated, the position, color, intensity etc.. of the texture can be changed at diffrent times within the animation to give the effect desired.
When you finally exit the tunnel you are faced with the names of the authors. The light animation was done by key framing the position of the spotlight at the appropriate positons. This animation was very similar to key framing an object but instead of using a created object you are able to manipulate the spotlight position, angle, intensity and other attributes of the spotlight.
We selected the music for this animation with the idea of synchronizing the sound and the action in the animation. We knew we wanted an omninous sound that changed when the camera enters the tunnel.
We eventually decided on a clip of a track from the Robin Hood motion picture soundtrack. The piece is entitled Sir Guy of Gisborne and the Escape to Sherwood as composed and conducted by Michael Kamen. We believe that it compliments the animation very well.
We found Alias to be a good choice for any animation project. The tools were difficult to learn and complicated to use but it is clear that an experienced user could create magnificent animations and models with this tool. However, to complete the animation in a timely manner one must decide on what you feel is important the animation or the modelling, we believed that the animation was the most interesting and important.
During our attempts to explore the different types of animation available in Alias we learned a great deal about the progress being made in the animation field. From the simple ideas such as keyframing to the advanced randomness of the particle systems it is clear that the animation field is advancing in great steps. In our animation we were able to include examples of camera animation, particle system animation, texture animation and object animation.
Although the on-line documentation is impressive and easy to follow, we felt that a book on the Alias system would have been a great asset to us.
Overall, this project gave us a new appreciation of the work required to produce a quality animation let alone a full length feature such as Toy Story. We will watch with new eyes.