The idea of our animation project came up our mind in early November from
the movie called "LES GRAND BLUE" (Directed by Luc Besson, 1988, France).
As the title implies, most parts of the movie are taken around the ocean
and under the water, and it is a true story about a man who loves the
ocean more than anything else. As watching those remarkably beautiful
scenes, we desired to create our 3P98 animation project as a miniature
version of the movie or something that relates to the ocean, dolphins, and
fishes. The idea was inaccurate at the beginning; however, it became
concrete as we spent more time and put effort on the project. As a result
of that, our final animation product satisfies us more than what we
originally expected.
The following is a documentation of the developing process of our
animation project as well as the aspects of each object, texture, and
scene that we worked on by using a powerful tool, Alias V8.5 Power
Animator.
Tiny tale
"Tiny Tale", which represents the title of our animation, takes the seer
to our dream world.
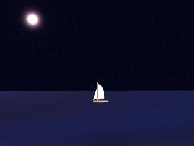
The animation starts from a very calm ocean scene in the night, and the
seer gets closer to the sailboat on the middle of the ocean under the full
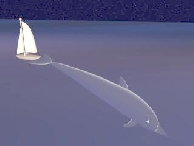
moon. Suddenly, two dolphins jump pleasantly around the boat and him and
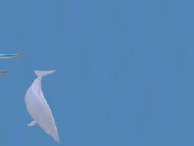
dive into the water. He now follows one of the dolphins, which swims down
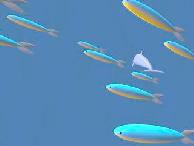
deeper to the sea as crossing a couple of groups of fishes. The place the
seer reaches is the bottom of the ocean and finds tropical sea plans and
fishes. It is such a beautiful place and those unimaginably colourful
fishes and plants lead the seer to their secret place. In the final scene,
he discovers a treasure box as well as those fishes and plants he
previously saw. What will be in the box? Does he expect a lot of precious
jewellery and treasures hidden for a thousand of years?
Object Construction
1: Dolphin
Dolphin was the first object, which we started working on. In order to
model a dolphin, first we had to learn how to control the CV curve tools
in Alias. The dolphin was basically modelled by a lot of pictures and
photos as well as the movie mentioned above which gave us a great number
of information and aspects of the object. A lot of modification was
required to make a dolphin look real, and several days were spent on it.
The wire of dolphin body was constructed only by CV curve and boundary
surface. Fist thing that we needed to do was to determine the length and
width of the dolphin and sized up or down by using Xform -> modify. The
length was used when we drew the back using the front window on Alias, and
width was for the width of the dolphin. Once the outer wire of dolphin was
constructed, translation, rotations, scaling, moving and duplicate were
repeated in order to cut its surface as little as possible. The lower part
of the body was constructed by basically the same way as the upper part.
Once we had wire in pieces, then using boundary surface option created
each surface. For our dolphin, each surface had four boundaries, so we had
to use the tool specified for the four boundaries.
Type of texture used: Ramp (Type = U ramp; Interpolation = 6 colour linear
interpolation)
2: Sailboat
The sailboat in this animation was taken from the instruction in the
"Alias Beginner's Guide". It was a great way to learn how to model objects
using CV curves as well as the types of usage of the primitives in Alias
Power Animator. The sail was the most complicated component to create
among the other components. In order to give the sail wind affection, we
used Xform -> modify and picked up each edit point to change the curves
more appropriate.
3: Sea
The sea appears with the back ground of night sky at the beginning of our
animation was actually created by a huge size of cube from Alias primitive
object. We assigned the top face of the cube as transparent with the sea
surface colour reflected by the moon, and the other five faces are
assigned to the colour of the sea. In this way, we were able to show the
dolphins aspect from under to over the water.
Type of texture used: Water Proc (for the top face)
4: Moon
Point light source was used to create the moon. To make it real, we tried
to modif
y the intensity and colour of the light several times. We believe
that assigning pink colour to the moon makes the peaceful night image that
we originally desired.
5: Sky
The night sky appears at the beginning of the animation, we used a texture
called granite from the Alias texture library. What we had to do in order
to make it look like a night sky with stars was to invert the default
colour of the texture, and adjust the randomness and colour of the
points(stars).
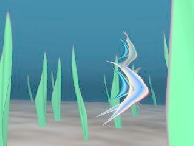
6: Fishes
Fishes were basically constructed by the same way as the dolphin, but we
made a surface of the body by using skin from the surface option.
We first drew the outer of the fish with CV curves, and assigned it a
surface. Then, by using the CV curve modification tool, we adjusted the
width of the fish. So far, the wire was only for the half of a fish body,
but it was duplicated with 180-degree rotation on the Y-axis to make a
whole body of a fish.
Type of texture used: (appearance order)
Fish#1(tail): woods-plants file #5; Ramp (Type = V Ramp; Interpolation =
3-colour interpolation)
Fish#2(body): Ramp(Type = V Ramp; Interpolation = 4-colour interpolation)
(tail): Ramp(Type = V Ramp; Interpolation = 5-colour
interpolation)
Fish#3(body): humans-animals/lizard
(tail): Ramp(Type = V Ramp; Interpolation = 5-colour
interpolation)
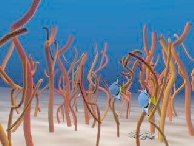
7: Plants
All the plants were basically constructed by CV curves except the red
plants. It was created by circle primitive object and CV curve. The circle
object was width of the plant, and the CV curve was drawn along Y-axis
direction to make a height of it. Then, we used the trim surface option to
make it body.
8: Bubbles
Because our animation is about mostly the world of under the water, to
generate bubbles was the most appropriate way to satisfy the project
requirement of using a particle system. By using the light source, we were
able to produce the bubbles in the last scene. Once we selected New Light
from the multiLister (Window -> multiList .. -> listAll), we simply
turned on the emit particle option in the window, and chose the type of
the particle. We selected the bubble from the list, made transparency
option on, and gave it a blue colour.
Animation
1: Object Animation
Most of the objects appeared in our animation were creatures under the
water, and to give them appropriate and smooth movements, we used motion
path animation tool. We first selected set motion path option from the
palette, then in the option window we were asked to set the start and end
key frame. At this time, we definitely had to know the exact duration of
the object's movement (Later on, we found out how to copy and past the
frames). Then we needed to set the flow option to slice the body of each
creature in order for it to follow the motion path. We sliced the body
into maximum numbers (10), and it gave each object smooth motion. This
tool was gratefully appreciated because without having this function, we
definitely had to change our story line to something else that did not
need to have such a smooth movement.
We animated the sailboat by setting key frames. It was set to the desired
position and from Animation toolbar, there was an option called set key
frame to set the start and end key frame for a picked object. The great
thing of using this function was that it automatically calculated the
position of the picked object at each frame between two key frames
(tweening).
Moving, rotating, or modifying the CV curve position animated the tails
and fins of the fishes.
2: Camera Animation
We used seven cameras in total in our animation.
Third and firth ones were used as Camera cut. Because we wanted to catch
the dolphin, which was swimming down into the sea, from the under and top
of the object. First camera was selected and set the first and end key
frames at the same position. Then in order to switch the camera to the
second one, first we created new camera from the tool bar Layout, and then
made sure that the window currently active was Perspective. Under
Perspective in Parameter control option, we checked camera, which implies
that the second camera was currently activated. Then we set the first and
end key frames at the same position as well for the second camera, but
when we set key frame, there were several options that we needed to
modify. One was to set the key frame as local, and the other one was to
select step in out target type option from set key frame. Following those
steps made camera cut possible in a scene.
Camera motion path was used for the sixth camera (for the scene, which has
tropical red plants and blue fishes). The idea to make the camera to
follow the motion path was the same as setting an object along the curve.
The rest of cameras were positioned by using key frame.
3: Light Animation
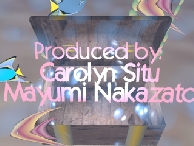
Light animation was used at the last scene. The bubbles were first set in
the treasure box, and as the lid of the box opening, the position of the
bubbles was moving toward the centre of the spotlight. Without being the
area of the position the spotlight was focusing on, the bubbles would not
be seen clearly; however, this technique perfectly solved our problem.
Conclusion
It was a lot of fun doing the animation; however, staying up until 6:00am
was not what we expected. In our opinion, "The beginner's guide of Alias"
was really helpful during our movie process.
The good thing was that we were able to divide our work based on the
individual group member's ability. Mostly, Carolyn focused on modelling
the objects, and Mayumi did animation on them, but basically, we learned
both parts by teaching each other.
We would like to thank Andi and other groups for their advice and help
during our movie making. It was a great opportunity to work with and to
learn from other people.
Over all, there is no doubt to say that if we had an another chance to
create an animation, we would be able to impress people more; however, we
believe that the "Tiny Tale" is the result of our effort.